DOM Manipulation

Did you know that you can use JavaScript to create nearly an entire webpage? Sounds ridiculous, but it's true, and I will prove it: Here is a version of the page made in Your First Webpage:

Your First Webpage

And here is the entirety of its body contents:

The Descendants Of The body Element
<script type="text/javascript" src="./first_page.js"></script>

While doing this is quite impractical, that does not take away from the fact that you can create elements and text nodes, assign attributes, and basically rearrange, add to, or delete from the DOM with JavaScript.

The reasons for doing this are complex. Perhaps you want to create a dynamic menu that updates itself when the page is changed. Perhaps you want some JavaScript-based application to appear only for those that can use it (such as my JavaScript-based printing tools).

Now, there is a method of adding text and elements known as innerHTML. Not only is it the coding equivalent of junk food, it limits you to HTML (it does not work with XHTML), not supported on all browsers, and limits what you can do with it.

DOM methods, on the other hand, do not limit you to either a single markup language (whether or not you use the others is irrelevant), is more flexible, and is supported on more browsers.

Text and Element Nodes

This section concentrates solely on text and element nodes; attribute nodes are handled through their own special functions.

Creating Nodes

This part is fairly simple. The document node object offers two functions for node creation:

To create a new element:
document.createElement
To create a new text node:
document.createTextNode

Both methods take a single string for an argument.

Creating An Element Node

The string passed to createElement is the element's name. If it's of an (X)HTML element, the browser will treat it like any other (X)HTML element of its type; for example, an ul element created through JavaScript will be treated like a ul element created normally.

An element created through JavaScript that is not found in (X)HTML—say, js_ul—will be treated as an inline element, unless you style it otherwise through CSS. CSS does not care whether or not an element is found in (X)HTML; one element name selector is the same as the next (in fact, creating elements not found in (X)HTML can help keep your CSS rules and element nodes from tripping over each other).

Nor will this cause trouble when you validate your (X)HTML—validators merely check the markup that exists originally, not what's added by JavaScript.

For best results, when you create an element node, assign a reference to a variable. Doing so allows you to change its style and manipulate it in other ways.

Creating An ul Element Through JavaScript
var u_list = document.createElement("ul");

For creating multiple nodes (which is often done), you can do so through a loop, assigning the element node references to an array. Below is a loop that creates 10 li element nodes:

Creating Ten li Elements Through JavaScript
var li_arr = new Array();
for(var l = 0; l < 10; l++){
li_arr[l] = document.createElement("li");
}

Earlier you had node lists that you could treat like an array, now you have an array that you can treat like a node list.

It's important to note that when you create an element node, it does not have a text node yet.

Creating A Text Node

The string passed to createTextNode is, simply, the contents you want the text node to have. For example, to create a text node with the value Something else, I would have the following code:

Creating A Text Node
document.createTextNode("Something else")

You could indeed assign this to a variable as well, but text nodes are usually put right to work. I'll show you how.

Placing Nodes

A node is absolutely useless until it has a place in the DOM. There are two ways you can place a node:

Both functions belong to element nodes.

Appending Nodes

To append something means to add it to the end of something else, like an appendix in a book. Thus, appendChild adds a child node to the end of the parent node, which is the object of this method.

It is this function that is often called as well when creating text nodes, which are immediately appended to their respective child elements.

The following example is part of the script of a page on the CD, which displays all colors with a compact hex code (i.e. three hex digits instead of six). A portion is shown below:

A portion of the page, showing the JavaScript-generated menu

Below I create a ul element, an array of li elements, and append to each of those a text node.

Creating The Menu
var nav_list = document.createElement("ul");
var tabs = new Array();
for(var l = 0; l < reds.length; l++){
tabs[l] = document.createElement("li");
tabs[l].appendChild(
document.createTextNode(
reds[l].getElementsByTagName("caption")[0].firstChild.data
)
);
nav_list.appendChild(tabs[l]);
}

You may wonder what on earth is contained in the variable reds, which appears to be an element node list of some sort. Well, now we get into the reason we pull this sort of stunt.

The page in question has 16 tables of 16 rows and 16 columns, each table cell showing a different color. The rows are in ascending green value, the columns in ascending blue value, and the tables are arranged in ascending red value. The variable reds, therefore, is this:

Where I Get The Value Of reds
var reds = document.getElementsByTagName("table");

Now it is clear that the above list creates a navigation list based on the tables in the webpage containing a list item for each table in the document. The script-generated li elements then have text nodes appended to them, which are simultaneously given the text contained in the respective caption elements—that, by the way, is why newly-created text nodes are usually not assigned to variables; normally they're appended as soon as they're created.

Yes, I know there will be 16 tables. That's beside the point; this script generates a tab for every table, regardless of how many tables there are on the page. If I wanted to include every single value for red, I would end up with 256 tabs without having to change the script—though the resulting page would probably be too large for the average computer.

If this were an external script, it would create accurate tabbed menus for every page it was linked to—assuming, of course, each page follows the pattern this script was coded for.

Inserting Nodes

Sometimes, however, the placement of the new node is important. For this, DOM offers the method insertBefore. This takes two arguments: the node you are inserting, and the node it's supposed to be inserted immediately before. The node referenced by nav_list is intended to be inserted in the body element before any of the tables. So, after the for loop, I have the following line of code:

Inserting The Menu Where I Want It
var body = document.getElementsByTagName("body")[0];
. . .
body.insertBefore(nav_list, reds[0]);

The above code says, In the element node referenced by body (which is set to the body element), insert the element node represented by nav_list immediately before the first element in the node list reds (which happens to be the first table element). Do note, I have to specify the parent element when inserting nodes; otherwise I will get an error when the nodes can't be found.

Generating Any Number Of Nodes

Back in Forms, I demonstrated the textarea element, which writes three paragraphs to three p elements:

The Original textarea Demonstration
var form = document.getElementById("Form");
var txt = form.Text;
var write = document.getElementById("Write").getElementsByTagName("p");
form.Click.onclick = function(){
var txt_split = (txt.value.match("\r\n"))?txt.value.split("\r\n"):txt.value.split("\n");
var l = 0;
var pc = 0;
while(pc < write.length && l < txt_split.length){
if(txt_split[l].length > 0){
write[pc].firstChild.data = txt_split[l];
pc++;
}
l++;
}
}

But through the creation and appending of nodes, you can create and append as many p elements as you please:

The textarea Demonstration Allowing For Infinite Paragraphs
Added Lines In Bold
Altered Lines Underlined
var form = document.getElementById("Form");
var txt = form.Text;
var write = document.getElementById("Write");
var pars = new Array();
form.Click.onclick = function(){
var txt_split = (txt.value.match("\r\n"))?txt.value.split("\r\n"):txt.value.split("\n");
var pc = 0;
var l = 0;
while(l < txt_split.length){
if(txt_split[l].length > 0){
pars[pc] = document.createElement("p");
pars[pc].appendChild(document.createTextNode(txt_split[l]));
write.appendChild(pars[pc]);
pc++;
}
l++;
}
}

And the result (four paragraphs):

Paragraph elements are created, instead of just being written to

Clicking the button again will append yet more paragraphs.

Removing Nodes

Sometimes you want to remove a node. The method for this (and again, you use this method with the targeted node's parent element node) is removeChild.

This method has the child node intended for removal sent to it. However, so long as a variable has a reference to that node, a removed node still exists. For example, say I have a paragraph (which is referenced by the variable par_1) that I want to remove from the top of the body, then paste it at the bottom. I would first remove the paragraph from the body, and then append it again.

I use this trick in the following script, which cycles paragraphs up and down (moving them down requires the insertBefore function.

Using removeChild, appendChild, and insertBefore To Move Paragraphs Around
var bod = document.getElementsByTagName("body")[0];
var button = document.getElementsByTagName("button");
var pars = document.getElementsByTagName("p");
button[0].onclick = function(){
var par = pars[0];
bod.removeChild(par);
bod.appendChild(par);
}
button[1].onclick = function(){
var par = pars[(pars.length - 1)];
bod.removeChild(par);
bod.insertBefore(par, pars[0]);
}

Each time a button is clicked, it removes one of the paragraphs from the body element node, but then puts it somewhere else, though that does not have to be the case.

Replacing Nodes

Another way to manipulate the DOM is to swap one node for another.

Below, I have a page that uses a table to display various function names and what they do:

A Table Of Functions

I also have the following script:

A Script That Builds A Definition List From The Table
Includes A Click Event To Allow The Two To Be Switched
// Create references to body and table, and tr elements. Prepare an array for table cells.
var body = document.getElementsByTagName("body")[0];
var table = document.getElementsByTagName("table")[0];
var trs = document.getElementsByTagName("tr");
var tcs = new Array();
// Create a dl element, and prepare an array for its child elements.
var dl = document.createElement("dl");
var dli = new Array();
// Through a loop, append text nodes to the dt and dd elements, the table cells for text information, then append dt and dd elements to the dl element.
for(var l = 0; l < trs.length = 0; l++){
tcs[l] =[
trs.getElementsByTagName("th")[0].firstChild.data,
trs.getElementsByTagName("td")[0].firstChild.data
];
dli[l] =[
document.createElement("dt"),
document.createElement("dd")
];
dli[l][0].appendChild(document.createTextNode(tcs[l][0]));
dli[l][1].appendChild(document.createTextNode(tcs[l][1]));
dl.appendChild(dli[l][0])
dl.appendChild(dli[l][1])
}
// Create a click event that switches between table and dl.
var click = document.getElementsByTagName("button")[0];
click.onclick = function(){
if(click.firstChild.data == "Change To Definition List" ){
body.replaceChild(dl, table);
click.firstChild.data = "Change To Table";
} else {
body.replaceChild(table, dl);
click.firstChild.data = "Change To Definition List";
}
}

At first, the dl element is in limbo, not part of the DOM just yet. But with a click of the button, the dl element node is switched with the table element node, and now the dl element is part of the DOM, and the table element is in limbo.

Clicking a second time reverses the action.

Manipulating Tables

Back in The Document Object Model, I mentioned that in an HTML DOM, tr elements were the child elements of tbody elements, not table elements. This is especially important to remember when you're manipulating tables, because while what HTML-created tr elements that are not explicitly placed in a thead or tfoot element are placed in tbody, tr elements created through JavaScript follow no such rule. If you append a tr element to a table element, to a table element it will be appended—and most likely show up between tbody and tfoot.

Yes, you are hearing the voice of experience here.

Attribute Nodes

Earlier, I was talking about attribute nodes, and I introduced you to the method getAttribute, which got the contents of an attribute's text node. There are two other methods that deal with attribute nodes:

Setting Attributes

The setAttribute method sets the value of an attribute—if the element doesn't have that attribute to begin with, then the setAttribute attribute creates the attribute node as well as setting its value.

It takes two arguments, both strings:

  1. The attribute name
  2. The attribute value

The script below will set the title attribute to the first p element of any webpage to This is the first paragraph.

Giving A p Element a title Attribute
document.getElementsByTagName("p")[0].setAttribute("title", "This is the first paragraph");

Here's the result:

Paragraph now has a title attribute

Removing Attributes

The removeAttribute method simply removes the attribute from the element with which the method is associated. It takes one string argument: the name of the attribute to be removed. If the attribute name isn't found, then the script simply moves on.

Using This To Your Styling Advantage

In JavaScript Styling, you saw how to change the style of an element with JavaScript. But what if you wanted to tailor a stylesheet to take full advantage of JavaScript, but didn't want to leave everyone who had JavaScript turned off in the lurch? Or you wanted to change... a lot?

To the first, remember that link elements use href attributes and through setattribute, you can change the value of those attributes. This allows you to have a stylesheet that will be used if JavaScript is turned off, and one that takes full advantage of JavaScript. The second, of course, will require that JavaScript alter the href attribute to point to it.

To the second, you can simply add an attribute, then use the attribute selector as mentioned in CSS Selectors to apply the rules. Even if the attribute and its value are not in the (X)HTML specification, CSS will affect any element that has that attribute. Remember, though, not all major browsers support attribute selectors. With recent versions of Internet Explorer supporting these methods, however, this is changing.

I'm going to use the page with the tabbed menu used back in JavaScript Styling to demonstrate both. We'll start with the two stylesheets.

The Stylesheets
Default Stylesheet (bordered_tabbed_menu_nojs.css)
body{padding-left:130px;}
#Menu{
position:absolute;
top:10px;
left:10px;
}
#Menu, #Menu li{
margin:0;
list-style-type:none;
padding:0;
}
#Menu li{
padding:5px;
border:1px solid black;
width:100px;
font-size:14px;
text-align:center;
}
JavaScript-Specific Stylesheet (bordered_tabbed_menu_js.css)
body, ul, li{
margin:0;
padding:0;
}
#Menu{
position:absolute;
list-style-type:none;
top:0;
left:20px;
margin:0;
padding:0;
}
#Menu li{
position:absolute;
vertical-align:top;
border:1px solid black;
border-bottom-width:0;
height:30px;
width:100px;
margin:0;
padding:0;
text-align:center;
line-height:30px;
top:20px;
background-color:white;
font-weight:normal;
font-size:normal;
font-style:normal;
font-variant:normal;
}
#li_1{left:20px;}
#li_2{left:121px;}
#li_3{left:222px;}
#li_4{left:323px;}
#li_5{left:424px;}
.section{
border:1px solid black;
width:600px;
padding:0 0 0 10px;
background-color:white;
position:absolute;
top:51px;
left:10px;
display:none;
}
#Menu li[current]{
height:31px;
font-weight:bold;
font-size:16px;
font-style:oblique;
font-variant:small-caps;
}
div.section[current]{display:block;}
The link Element
<link type="text/css" href="./bordered_tabbed_menu_nojs.css" rel="stylesheet" id="StyleSheet_1">
The Script That Changes Stylesheets
document.getElementById("StyleSheet_1").setAttribute("href", "bordered_tabbed_menu_js.css");

The second stylesheet assumes that the user can somehow interact with the page and make the various sections visible or invisible at will, something that can only be done through a client-side script. But if you look at the link element's href attribute, it points to the first stylesheet, which assumes no script. The JavaScript coding in the fourth part of the example shows how the script alter that element to point to the script-requiring stylesheet. In other words, the stylesheet that assumes JavaScript is enabled requires JavaScript to be enabled to be used at all.

Take a look at the rules for #Menu li[current] and div.section[current]. In HTML 4.01 and XHTML 1.0, there is no such thing as the current attribute. CSS doesn't care. Using the setAttribute function, the attribute will be applied to the DOM, triggering the respective rules, and removed through the removeAttribute function, causing the elements' styling to revert.

A validator won't know that this is going on; validators only read the webpage code, not the DOM, so extra attributes set through JavaScript won't raise errors. Below is the adjusted script:

The Updated Script
var menu_items = document.getElementById("Menu").getElementsByTagName("li");
var h2s = document.getElementById("Sections").getElementsByTagName("h2");
var cur = 0;
for(var l = 0; l < menu_items.length; l++){
menu_items[l].onclick = function(l){return function(){
menu_items[cur].removeAttribute("current");
h2s[cur].parentNode.removeAttribute("current");
menu_items[l].setAttribute("current", "");
h2s[l].parentNode.setAttribute("current", "");
var cur = l;
}}(l);
}
h2s[cur].parentNode.setAttribute("current", "");
menu_items[cur].setAttribute("current", "");

I know I didn't give a value to any current attribute. Because of the way the stylesheet works, I don't really need to; I only need two different values, so I can get away with a take-it-or-leave-it approach here, but I have had to define actual values for attributes set through JavaScript, since there was a choice between three options.

This means of changing stylesheets, incidentally, is how I allow you to create custom print stylesheets (as introduced in the prologue).

JavaScript Hover Effects

JavaScript used to be the way to create image rollovers or make extra text appear when you hovered over an element. That has been superceded by the :hover pseudoclass in CSS—for the most part. There are still things JavaScript can do that cannot be replaced through CSS for a simple reason: CSS is not a programming language and cannot rearrange the DOM. JavaScript is and can.

Javascript's ability to rearrange the DOM comes with a complication of its own: you need a way to undo the changes. So this requires the onmouseover event to change the DOM and the onmouseout event to change the DOM back.

Image Rollover Effects With JavaScript

Simple image rollovers are reasonably easy in CSS, and I explain how to do them in CSS Backgrounds. But this method has a limitation: You can only switch between two pictures. Furthermore, the new image is only downloaded when the rollover is triggered. This can cause a noticeable delay in seeing the first image and seeing the second.

In JavaScript, you can switch between as many as you like, even switching to a random graphic. Furthermore, you can use JavaScript to preload alternate images (this will assist image rollovers done in both languages).

A Rollover Using JavaScript
The img Tag In Question
<img src="image-large.png" alt="The Changing Image" id="Change_Image">
The JavaScript
var img = document.getElementById('Change_Image');
img.onmouseover = function(){img.setAttribute('src', 'image2-large.png');}
img.onmouseout = function(){img.setAttribute('src', 'image-large.png');}

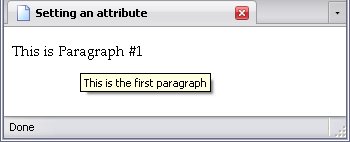
Note that this actually alters the src attribute. Because of this, you can change that attribute to a random value:

Randomized Rollover
var img = document.getElementById('Change_Image');
var images = new Array('image2-large.png', 'image3-large.png', 'image4-large.png', 'image5-large.png');
img.onmouseover = function(){img.setAttribute('src', images[Math.floor(Math.random() * images.length)]);}
img.onmouseout = function(){img.setAttribute('src', 'image-large.png');}

What I added was an array of file names. Then, using the trick I described in Numbers And Math, I change the value of src to a random file name from the array.

Preloading An Image

One way to pre-load an image is through the Image object. Preloading is one of this object's most common uses, though you can also get information such as an image's height and width. Basically, you create a new instance of it, then set its src property to the filename you want. The browser, having received a request for the image, downloads the image, even if the image not being used yet.

Preloading image2-large.png
var img = new Image()
img.src = './image2-large.png';

This way, when you use a JavaScript or CSS rollover effect, the image is already downloaded and will instantly appear.

The other way to preload an image, of course, is to create an img element and set its display to none, but then getting other information from it is more difficult.

Mimicking :hover:after

JavaScript can also mimic the :hover:before and :hover:after pseudo-class/-element combinations and its method is more widely supported (though this is changing).

JavaScript is also superior to CSS in flexibility. CSS is quite strict about where you can get and place extra content: extra content must be specifically described in the stylesheet (this includes counters) or it must come from an attribute. Second, the extra content must be either before or after that element through the :before and :after psuedo-elements. JavaScript allows you to get the content from anywhere in the (X)HTML document and put it anywhere in the (X)HTML document. Note this does not include the contents of :before and :after psuedo-elements. Those are set in a stylesheet, not the webpage, so as far as JavaScript is concerned, they don't exist.

The following example comes from my Examples page. The node lists of importance here are all the sup elements and the li elements nested within the div element with the ID Footnotes.

Getting The Node Lists
var sups = document.getElementsByTagName('sup');
var fns = document.getElementById('Footnotes').getElementsByTagName('li');

Using a method called cloneNode, a copy is made of the first (and in this case, only) child span element of each li element, adds some text to the cloned span elements, and adds each one to an array. This is done through a for loop.

Cloning The span Element Nodes
var notes = new Array();
for(var l = 0; l > fns.length; l++){
notes[l] = fns[l].getElementsByTagName('span')[0].cloneNode(true);
notes[l].insertBefore(document.createTextNode(' - Footnote ' + (l + 1) + ': '), notes[l].firstChild);
}

The reason we have to clone these nodes is because no node can exist in two places at once. If we tried to append any of the original span element nodes, they'd actually be moved out of their respective li element to their new location (feel free to try it). Therefore, we make copies of these span elements and stick them in an array for later use. They're not part of the DOM yet, which means we can use them wherever without worrying about screwing up our page.

The boolean value is there to tell the browser whether to include the cloned node's child nodes (along with their child nodes and so on) or not. If I set it to false, all it would do is clone a new span element node with its relevant attributes (useful for nodes with no children). However, since I want the entirety of each span element's contents as well, I set it to true. Then I insert a text node saying which footnote is being hovered over (helpful when a link has more than one footnote associated with it) before the cloned node's first child node. Because I do that with the cloned nodes, the originals (in the list of footnotes) go unaffected. Note that I use a bit of math: Arrays always start at 0, but the footnotes start at 1. The addition takes that into account.

Now, to set the mouse events on the sup elements. By definition, the number contained in those elements should correspond to a footnote. Therefore, I should be able to use the number contained therein and use it as an element array—with one little adjustment: footnotes start at 1. Arrays start at 0. Again, a little arithmetic is in order.

Remember, though: when you use JavaScript, you actually alter the DOM. When the onmouseover event appends a cloned node to an element, that cloned node is there. An extra event (I'll use onmouseout) is needed to make the appended node go away.

Setting Mouse Events
for(var l = 0; l > sups.length; l++){
sups[l].onmouseover = function(l){return function(){
sups[l].parentNode.appendChild(notes[(Number(sups[l].firstChild.data) - 1)]);
}}(l);
sups[l].onmouseout = function(l){return function(){
sups[l].parentNode.removeChild(sups[l].parentNode.lastChild);
}}(l);
}

The above loop sets up the events so that when we move our mouse cursor over a sup element, the element's content is converted to a number and lessened by 1, which should give us the array element containing the appropriate footnote. That footnote is appended to the sup element's parent element, by definition becoming the parent element's last child. When the mouse cursor is moved away, the last child (which is the footnote) is removed.

If someone doesn't have JavaScript turned on (or is using a browser that doesn't support it), there is still the footnotes section at the bottom of the page, which can be easily read.

How can you do this with CSS? Short answer: you can't. Long answer... Let me count the ways.

  1. The text made visible by these mouseovers is taken from the content of elements elsewhere in the DOM. The only place in the DOM that CSS would be able to get content would be (in this case) from attributes of the respective sup elements.
  2. The content of the span elements from which the content is taken contains markup, and JavaScript can copy this markup through the cloneNode function; this cannot be emulated with CSS.
  3. The content is not appended to the sup elements, but rather to their respective parent li elements. While CSS could make an illusion otherwise (unless you had two footnote numbers in a row), it would have to append it to the sup element itself.

Simply put, CSS simply cannot fully replace JavaScript—and doesn't have to. CSS and JavaScript play different roles in webdesign.

Other Things You Can Do With The DOM

While these isn't really messing around with the DOM, they may as well go here.

Document URI

There are two properties of the document node object that allow you to get the URI of a markup document (not just (X)HTML):

documentURI
This, quite simply, gets the URI of the document itself.
baseURI
If an absolute URI is set through the base element, then this property is the value of the base element's href attribute. If the value of the base element's href attribute is not an absolute URI or the base element is not included in the (X)HTML document, then the actual URI document is used instead.

In the case of the document URI being used, this means the entire URI, including anything after the following:

A hash mark (#)
These are often seen in URIs that point to a specific section of a document as defined in an id attribute. This ID does not need to exist for the script to use it.
A question mark (?)
Question marks in a URI usually begins a list of parameters sent to a server-side script via the URI, and also appear before the x and y coördinates sent via a server-side image map, as mentioned in Image Maps.

The URI can then be processed like any other string. Using the tabbed menu above, I use both the ? and the # to give options to whoever views the page. Take a look at the following if statement:

Using An Argument After A Question Mark
var uri = document.documentURI;
if((uri.indexOf("?") == -1) || (
(uri.split("?")[1].substr(0) != "NoJS") &&
(uri.split("?")[1].substr(0, uri.split("?")[1].indexOf("#")) != "NoJS")
)){
. . .
}

What this does is check to see if ?NoJS is found in the URI. In other words, bordered_tabbed_menu.html will take you to the page and use a tabbed menu, but bordered_tabbed_menu.html?NoJS will act as if JavaScript wasn't activated at all.

Further in this script is something that looks for a # in the URI. Usually, this will jump to an element with a specific ID (if it can find on). However, the script will use this to dictate which tab is showing by altering initial value of cur.

Setting The Value Of cur
var cur; // Short for "Current"
if(
(uri.indexOf("#") == -1) ||
(uri.split("#")[1].substr(0,3) != "Sec") ||
(isNaN(uri.split("#")[1].substr(3))) ||
(Number(uri.split("#")[1].substr(3)) > h2s.length)
){
cur=0;
} else {
cur = Number(uri.split("#")[1].substr(3)) - 1;
}

The variable cur is declared but not given a value. The ID that the page would normally jump to is processed by the script. The script checks:

(uri.indexOf("#") == -1)
Whether or not an ID is specified. If one isn't, this proves true, as -1 means the character wasn't found at all.
(uri.split("#")[1].substr(0,3) != "Sec")
(isNaN(uri.split("#")[1].substr(3)))
Whether or not the specified ID is correct. In this case, a) the first three characters have to be Sec and b) the rest of it must be a number.
(Number(uri.split("#")[1].substr(3)) > h2s.length)
This one is specific to this particular ID format: it checks to see if the number in the specified ID is greater than the length of the node list represented by the h2s variable.

If any of the above is true, then cur is set to 0 and the first tab is shown. If not, then cur is set to one less than the number specified in the ID—which could also be 0, but then that would be because the first tab was desired.

Below is the final result:

The Complete Tabbed Menu Script
var uri = document.documentURI;
if((uri.indexOf("?") == -1) || (
(uri.split("?")[1].substr(0) != "NoJS") &&
(uri.split("?")[1].substr(0, uri.split("?")[1].indexOf("#")) != "NoJS")
)){
document.getElementById("StyleSheet_1").setAttribute("href", "bordered_tabbed_menu_js.css");
var menu_items = document.getElementById("Menu").getElementsByTagName("li");
var h2s = document.getElementById("Sections").getElementsByTagName("h2");
var cur; // Short for "Current"
if(
(uri.indexOf("#") == -1) ||
(uri.split("#")[1].substr(0,3) != "Sec") ||
(isNaN(uri.split("#")[1].substr(3))) ||
(Number(uri.split("#")[1].substr(3)) > h2s.length)
){
cur=0;
} else {
cur = Number(uri.split("#")[1].substr(3)) - 1;
}
for(var l = 0; l < menu_items.length; l++){
menu_items[l].onclick = function(l){return function(){
menu_items[cur].removeAttribute("current");
h2s[cur].parentNode.removeAttribute("current");
menu_items[l].setAttribute("current", "");
h2s[l].parentNode.setAttribute("current", "");
var cur = l;
}}(l);
}
h2s[cur].parentNode.setAttribute("current", "");
menu_items[cur].setAttribute("current", "");
}

Filtering DOM Nodes

It's easy to select all p element nodes or span element nodes, but what if you wanted to select all p element nodes that have the class space, or all span element nodes that are child nodes of a header element?

Either one will actually take two arrays: the node list, and one created to hold the desired references. Below are scripts that do just that:

Filtering Elements
Select All Span Elements With Header Parents
var spans = document.getElementsByTagName("span");
var h_spans = new Array();
for(var l = 0; l < spans.length; l++){
if(
spans[l].parentNode.nodeName == "h1" ||
spans[l].parentNode.nodeName == "h2" ||
spans[l].parentNode.nodeName == "h3" ||
spans[l].parentNode.nodeName == "h4" ||
spans[l].parentNode.nodeName == "h5" ||
spans[l].parentNode.nodeName == "h6"
){
h_spans.push(spans[l])
}
}
Select All Paragraphs With Class Space
var pars = document.getElementsByTagName("p");
var s_pars = new Array();
for(var l = 0; l < pars.length; l++){
if(pars[l].getAttribute("class") == "space"){
s_pars.push(pars[l])
}
}

Of course, one has a really long condition, the other is too narrowly defined. So, we use extra coding for each to test their nodes. One, we have to match to strings from h1 to h6, a simple enough loop. The other, since class attributes can hold space-separated strings, require the string to be split, for which we'll create a function.

Filtering Elements
Select All Span Elements With Header Parents
var spans = document.getElementsByTagName("span");
var h_spans = new Array();
for(var l = 0; l < spans.length; l++){
var l = 1;
var matched = false;
while(l <= 6; && !matched){
if(spans[l].parentNode.nodeName == ("h" + l)){
h_spans.push(spans[l]);
matched = true;
}
l++;
}
}
Select All Paragraphs With Class Space
var pars = document.getElementsByTagName("p");
var s_pars = new Array();
for(var l = 0; l < pars.length = 0; l++){
if(pars[l].getAttribute("class")|| pars[l].className){
var class = (pars[l].getAttribute("class")?(pars[l].getAttribute("class"):(pars[l].className);
if(Class(class, "space")){
s_pars.push(pars[l])
}
}
}
function Class(classes, want){
var c_arr = classes.split(" ");
var l = -1;
do{
l++;
var matched = (c_arr[l] == want)?true?false;
}while(l < c_arr.length && !matched);
return matched;
}

The second one uses a nested if statement to make sure that the element has an class attribute at all, and uses the className property, as some browsers handle the class attribute differently than others, and this allows for both.

Browser Peculiarities

Subtitle: JavaScript is not quite JScript.

Back in Dynamic Behavior And Scripting, I mentioned that Internet Explorer had a scripting language very similar to JavaScript but was somewhat different in certain respects—particularly in the name of some of its attributes.

While I was writing this book, I did an experiment in which I created an image map from a list of links. As I mentioned in Image Maps, the area elements can be replaced with a elements, but that cause a lot of problems in certain browsers. One way I found around it was to create an image map from the list of links using JavaScript. The usemap attribute of the img element would indicate which navigation list was to be used, the a element would contain all the necessary information to build the map, and the usemap attribute would be updated to point to the correct element.

It works, and the HTML and JavaScript for this little trick is below:

Generating An Image Map From A Navigation List
The Image And The Navigation List
<img id="Mapped_Image" src="./image.PNG" alt="Image Map" usemap="#Navigation">
<ul id="Navigation">
<li><a
shape="rect"
coords="16,8 69,56"
href="http://validator.w3.org"
tabindex="1"
title="W3C Validator"
>W3C Validator</a></li>
<li><a
shape="poly"
coords="118,22 118,89 185,89 118,22"
href="http://www.w3.org/TR/html401/"
tabindex="2"
title="HTML 4.01 Specification"
>HTML 4.01 Specification</a></li>
<li><a
shape="circle"
coords="72,155 36"
href="http://www.w3.org"
tabindex="3"
title="W3C Homepage"
>W3C Homepage</a></li>
</ul>
The Script To Generate The Map
function MapLinks(img){
var nav_id = img.getAttribute("usemap").substr(1);
var map_id = nav_id + "-Map";
var links = document.getElementById(nav_id).getElementsByTagName("a");
img.setAttribute("useMap", "#" + map_id);
if(!document.getElementById(map_id)){
var map = document.createElement("map");
map.setAttribute("name", map_id);
map.setAttribute("id", map_id);
for(var i=0; i < links.length; i++){
map.appendChild(document.createElement("area"));
map.lastChild.setAttribute("shape", (links[i].getAttribute("shape")));
map.lastChild.setAttribute("coords", (links[i].getAttribute("coords")));
map.lastChild.setAttribute("href", (links[i].getAttribute("href")));
map.lastChild.setAttribute("title", (links[i].getAttribute("title")));
}
document.getElementsByTagName("body")[0].appendChild(map);
}
img.style.border = "4px groove red"; // This just gives a visual cue that the function did indeed take effect.
}
MapLinks(document.getElementById("Mapped_Image"));

See the highlighted line and underlined string? In most browsers, the usemap attribute name can be of any capitalization, even when set through JavaScript. But in Internet Explorer, when you set the attribute through JavaScript—or in this case, JScript—you must use useMap, otherwise IE won't recognize it.

This is an example of the subtle but very important distinctions between browsers. Most modern browsers come with a DOM inspector, which allows you to see a webpage's DOM the way the browser sees it. When you start fiddling around with the DOM, I highly advise you use the inspector for every browser you test in.

Creating The First Page With JavaScript

Below is the script I used to mimic the page from Your First Webpage using JavaScript:

Code That Creates A Page Purely Through JavaScript
function El(e){return document.createElement(e);}
function Txt(e,x){e.appendChild(document.createTextNode(x));}
function Inline(p, i, x){
var e = El(i);
Txt(e,x);
p.appendChild(e);
}
var body = document.getElementsByTagName('body')[0];
/* Header */
var h1 = El('h1');
Txt(h1, 'Hello World');
/* Paragraph 1 */
var p1 = El('p');
Inline(p1, 'strong', 'Welcome!');
Txt(p1, ' This is my ');
Inline(p1, 'em', 'first');
Txt(p1, ' webpage!');
/* Paragraph 2 */
var p2 = El('p');
Txt(p2, 'It\u0027s a fairly simple webpage, but it ');
Inline(p2, 'em', 'is');
Txt(p2, ' a complete webpage.');
/* Append Block Elements */
body.appendChild(h1);
body.appendChild(p1);
body.appendChild(p2);

There is one danger though: this is the above page with JavaScript turned off.

That's all I have to teach you about JavaScript. Feel free to research more about it; JavaScript is far more complex than what I've explained here. There are many more means of fiddling around with the DOM, but what I've taught you here should be enough to get you started.